Published on Feb. 3, 2026
PS Chicks Placement: Key practices for a successful start
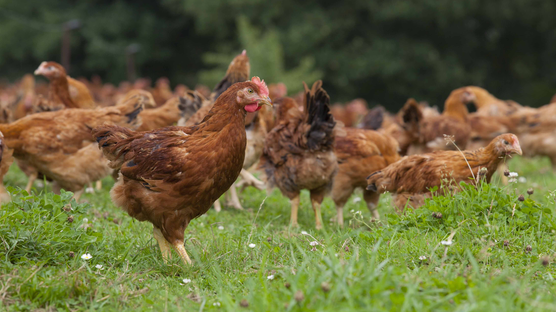
Chick placement represents a critical phase in poultry management, particularly for SASSO flocks where early performance strongly influences long-term results. The first hours and days set the foundation for growth, health, and productivity. This article blends practical guidance with clear structure to help producers achieve an optimal start.
Biosecurity is the foundation
Biosecurity stands as the fundamental pillar of flock success. Even flawless management cannot compensate for contamination at the start. After thorough cleaning and disinfection of the house, environmental samples must be taken and confirmed negative before installing equipment. Litter samples should also be collected prior to distribution. Any non-reusable material must be discarded, and reusable items—including boots and clothing—must be fully washed and disinfected. Throughout all cleaning phases, correct flow management between clean and dirty areas must be maintained. Biosecurity extends to chick unloading: the transport vehicle must be disinfected upon arrival, a designated team member remains outside with disposable overalls, and the driver never enters the house. Samples taken from box bottoms and the truck help verify sanitary status.
Preparing the House: A Stepwise Process
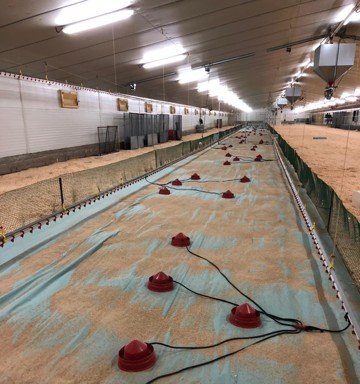
House preparation begins several days in advance and aims to create stable, warm, clean conditions for the chicks.
Preparation timeline (simplified):
- −96 to −48h: Cleaning, disinfection, and progressive preheating.
- −48 to −12h: Litter spreading, second disinfection, installation of equipment.
- −12 to −0.5h: Flushing drinker lines, distributing fresh feed, final checks.
Another important point in house preparation is to plan the unloading. In fact, producers must know the flock line, number of birds, density, available equipment, and breeder age category. Each section of the house should be marked with the corresponding line and sex, and the team must receive clear instructions on the unloading procedure.
It’s crucial to keep all the records regarding biosecurity, placement, health certificates... in the farm and file it before the beginning of the new flock. Before the chicks arrival all the blank records must be prepared in a new folder to keep them up to date during the whole cycle.
Before ensambling the different pens, densities must be considered:

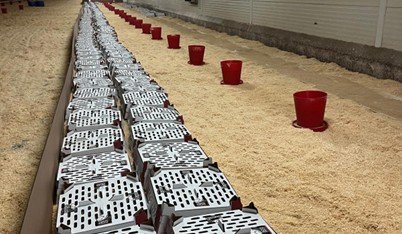
Before placement, water and feed must be accessible, fresh, and easy for chicks to find. First-age drinkers and feeders should be used, with nipple line pressure not exceeding 80 ml per minute. Drinker lines should be flushed one hour before arrival to guarantee cool, clean water. Feed must be distributed no more than two hours before the chicks arrive to preserve freshness. Ideal water parameters are a pH between 5 and 6 and free chlorine between 2 and 4 ppm. Glucose or vitamin C may be offered at placement, although electrolytes during the first week can contribute to pasty vents and are therefore not recommended at this stage.
Paper plays an important role in stimulating early feeding behavior. Covering 25 to 75 percent of the floor surface, paper attracts chicks through sound and provides space to spread feed. It is crucial not to cover the entire surface, allowing proper distribution of coccidial vaccine within the litter.
Temperature Management: Before, During, After Arrival
Temperature is one of the most influential factors in chick comfort and performance.
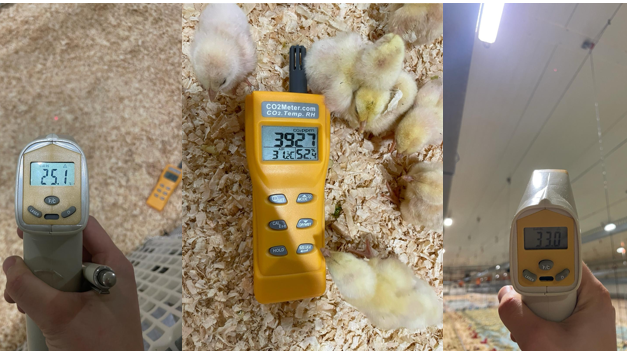
Before arrival, air temperatures should reach 32 to 34°C, the floor must be at least 24 to 28°C, and the litter between 28 and 30°C.
Water should be maintained between 18 and 21°C. During unloading, the house temperature may be temporarily reduced to 26–28°C to avoid thermal stress while chicks remain in their boxes, then increased again once placement is complete.
Measuring cloacal temperature on arrival, with an ideal values range from 39.5 to 40.5°C, helps determine the conditions experienced during transport and guides adjustments.
After placement, producers must respond to chick behavior rather than strict temperature values. Humidity influences thermal sensation, and excessive airspeed can cause wind chill: a 1 m/s draft may make day-old chicks feel up to 8°C colder.
Water & Feed: Fresh, Accessible, Immediate
The success of the first 48 hours depends heavily on hydration and feed intake.
After placement, rapid access to feed and water is vital. Crop fill targets are 80 percent at 12 hours, 90 percent at 24 hours, and 100 percent at 48 hours. Feed should be distributed several times a day, ensuring it is completely consumed between distributions. Paper must be cleaned daily to avoid feed accumulation, and drinkers and feeders must remain clean. Any water leaks require immediate litter replacement to prevent health issues.
Paper also stimulates early feeding behaviour, this is a simple but powerful tool.
Below are the best practices:
- Cover 25–75% of the floor area (but never 100%).
- Spread feed on the paper to promote exploration.
- Avoid full coverage to ensure proper coccidial vaccine distribution in the litter.
- Clean or remove old feed daily.
Lighting for stimulation
Light helps chicks locate feed and adapt quickly during the first days.
The recommended program is the following:
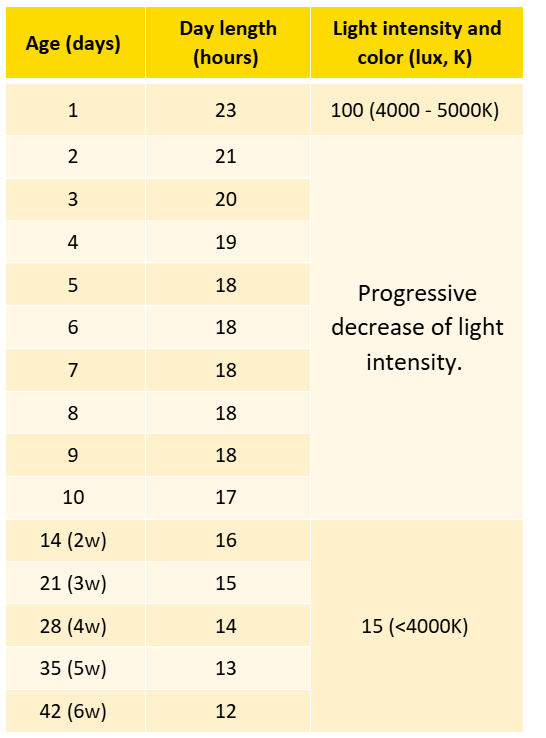
Nondark houses require adjustment to prevent unwanted early stimulation.
Transitioning to later age
Transitioning from first-age feeders and drinkers should be done progressively. These can begin to be removed around day four or five, depending on chick adaptation. Starter feed must be of the highest quality, and although feed is provided ad libitum until five weeks of age, chicks should still be weighed regularly to monitor performance.
When expanding space, mixing litter from the initial brooding area with fresh litter promotes uniform immunization.
Conclusion
Ultimately, successful chick placement relies on a combination of strict biosecurity, meticulous preparation, attentive management, and continuous observation. The behavior of the animals provides crucial feedback, and the first five weeks shape the long-term performance of the flock. Ensuring optimal water and feed consumption, correct environmental conditions, and organized logistics will define the success of the entire production cycle.